OK, so I’ve built a couple of 1/72 scale SE-5as, but I have to ask…
How the hell do you do the rigging?!
My 1/48th Corgi SE-5a looks frighteningly complicated, even though it probably isn’t… 😮
Also, what’s best to use for the flying wires? Stretch sprue? Fishing line?

By: hampden98 - 10th July 2012 at 11:09
Depends on your own preference I guess.
A lot of things scale out far too large at 1:72nd. Undercarriage doors, canopies, panel lines, rivets.
I think 1:72nd aircraft look better with visible wires as we expect to see them. It’s also a modelling challenge.
By: J Boyle - 10th July 2012 at 05:34
Aren’t wires for a 1/72nd kit a bit overkill?
No matter how fine of line you use, they scale out far to large.
By: hampden98 - 8th July 2012 at 12:00
Has anyone tried knitting elastic?
It’s meant to be very good for 1:72nd biplanes.
I have some on order. Not tried it yet. About £4 for a reel and delivery on Amazon.
By: tornado64 - 7th July 2012 at 18:19
Looks like I’ve been wasting my time.
far from it !! yours are superb i was just giving options on how others tackle it also
i apreciate anyone who can do such a good job as you have done in 1/72
mine often end up as crumpled heaps on the modelling board as carpal tunnel and patience gets the better of me and i flatten the little gits into the board !!
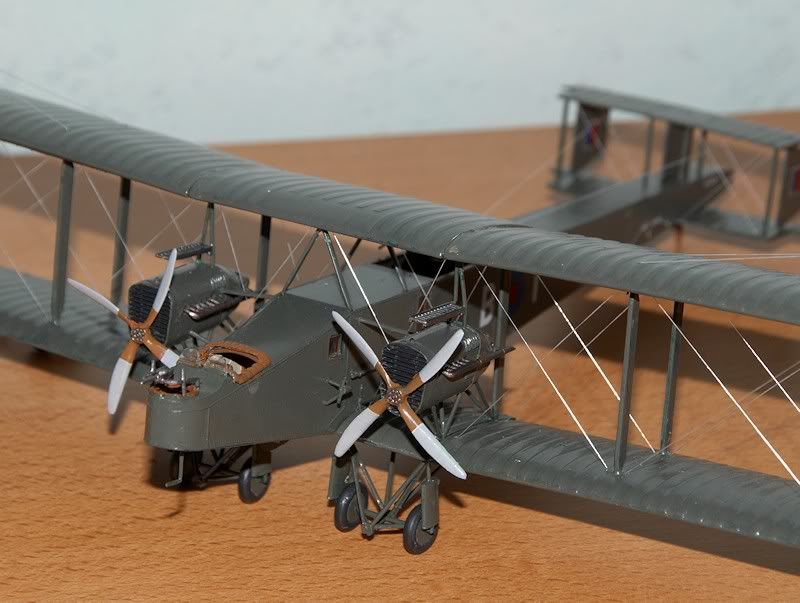
better not tackle the gotha bomber lurking in the stash just yet !!
By: kev35 - 5th July 2012 at 12:12
Thanks Arthur, those will be very useful.
Regards,
kev35
By: Arthur Pewtey - 5th July 2012 at 11:43
It was the weekend edition if I recall. Are these any good Kev?

If I remember it was a thoroughly enjoyable kit to build.
By: kev35 - 5th July 2012 at 11:15
Yes Arthur, you’ve done a terrible job. :rolleyes:
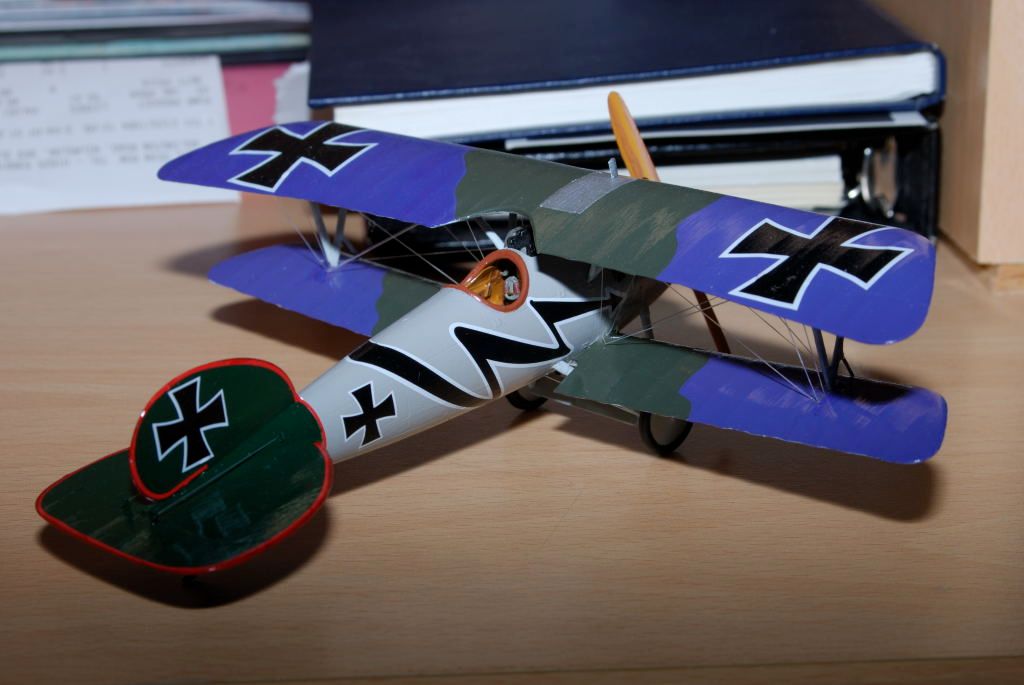
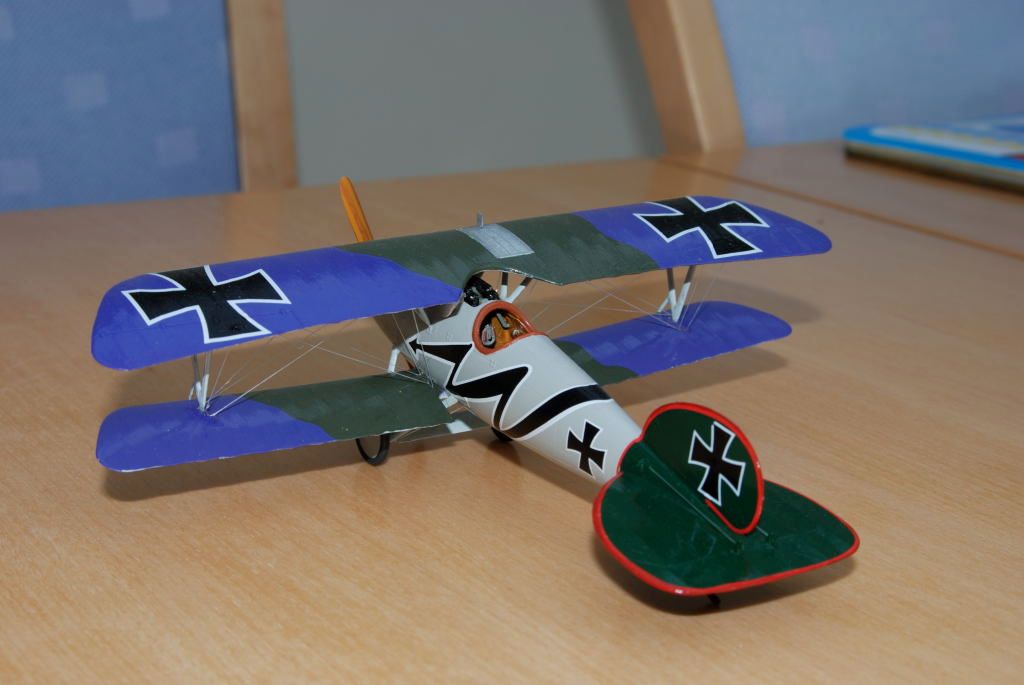
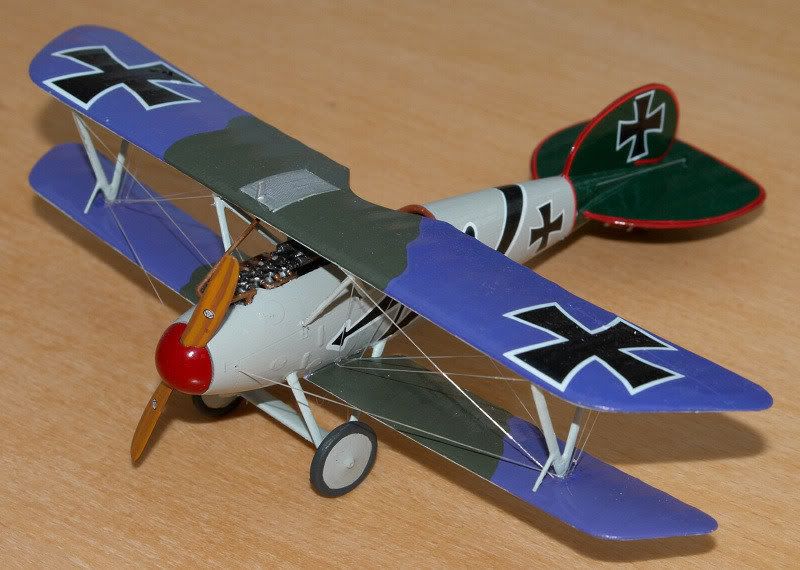
Do you have any more photos of your Albatros from other angles please? Was yours the full edition with PE or the weekend one?
Regards,
kev35
By: Arthur Pewtey - 5th July 2012 at 10:28
this also gives correct rigging apearance
Looks like I’ve been wasting my time.
By: tornado64 - 5th July 2012 at 09:58
appologies bobs buckles only do 1/48 and 1/32 i think companies like eduard do 1/72
By: tornado64 - 5th July 2012 at 09:48
the ultimate way is by using micro drills , turnbuckles and rigging thread look up “bobs buckles ” on a google search there should be all the info required and sales for his turnbuckles (best on the market )
it is done by micro drilling the wings glueing a turnbucle in situ puting the rigging through and securing with a sleave
this also gives correct rigging apearance
there are other methods but this is the best all rounder !!
By: DazDaMan - 4th July 2012 at 21:13
Yeah, I’m beginning to regret the choice of building the SE5a in 1/72 scale now…! 😮
By: kev35 - 4th July 2012 at 19:40
Hi Arthur.
The bad language I reckon I can manage after doing battle with an Aries resin and PE cockpit for a Hobbyboos Fury. It’s been a bit of a three cornered competition, the score line so far is PE – 3, Carpet Monster – 2 and me bringing up the rear on 1.
Your photo is much clearer than Revell’s instructions for the rigging so that is most helpful. For someone like me with big fingers, little patience and an airbrush, I think it might be best to try and secure the fuselage rigging from inside before the fuselage halves are closed and then I can drill through the wings to secure with superglueand tidy up later with filler as the airbrush allows a decent finish. In fact I’ve just airbrushed all the interior components desert yellow to try a wood grain finish. I’ll probably use Tamiya clear orange to get the grain.
Best try and get this FJ4B Fury out of the way first, and the Tamiya Grant (for a Far East diorama) and the half built (badly) Trumpeter Challenger that I was given at a show.
Thanks for the tips Arthur, Much appreciated.
Regards,
kev35
By: Arthur Pewtey - 4th July 2012 at 18:52
Thanks for the comments folks.
What is needed for successful rigging is thread, glue, sharp pointy tweezers and an inexhaustible supply of poor language. Also important is coping with ability of superglue to stick to everything except what you want it to stick to.
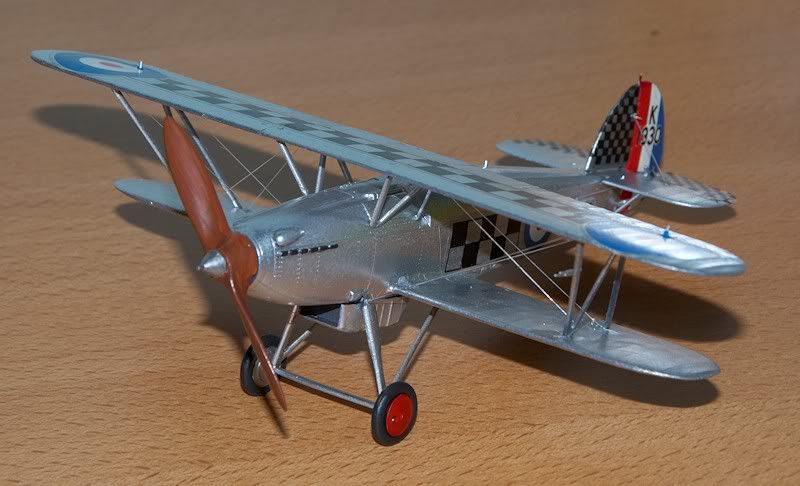
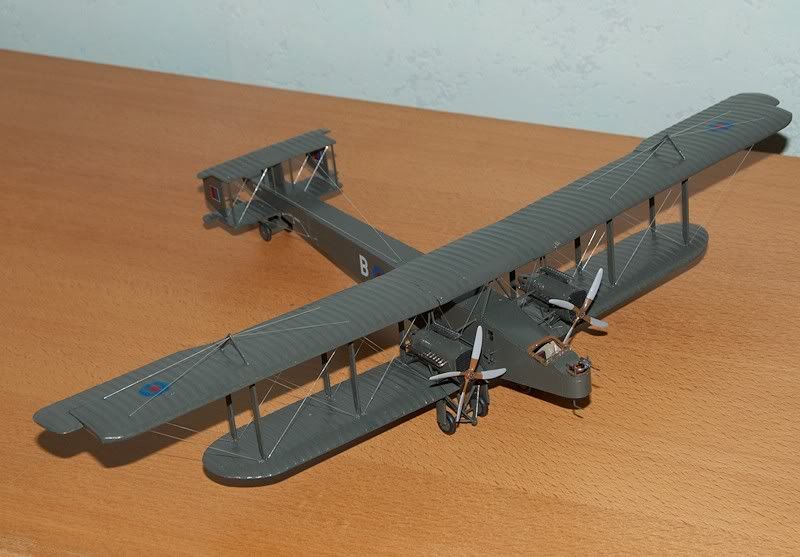
The Eduard Albatros would be a decent one to start with. 1/48 scale makes it a little easier and the rigging scheme isn’t too hard. Preparation is the key. It may be easier to rig it, or at least partially rig it before assembly is complete. I had a go a few years ago. It was one of first attempts at rigging and I’ve learnt a lot since then.
By: kev35 - 3rd July 2012 at 23:40
Those are nice Arthur. Biplanes fascinate me but the rigging terrifies me to be honest. Thinking about starting to cut into a Revell reboxing of an Eduard 1/48 scale Albatros DV.
Regards,
kev35
By: J Boyle - 29th June 2012 at 16:49
Aftermarket firms are offering photoetched wires for specific kits.
Here’s an example.
http://www.internetmodeler.com/artman/publish/nraviation/Starfighter-Decals-1-48-Academy-Hobbycraft-P-26-EZ-Rigging.php
If the idea cathes on, maybe I’ll finally be able to make a biplane model. 🙂
By: DazDaMan - 26th June 2012 at 23:00
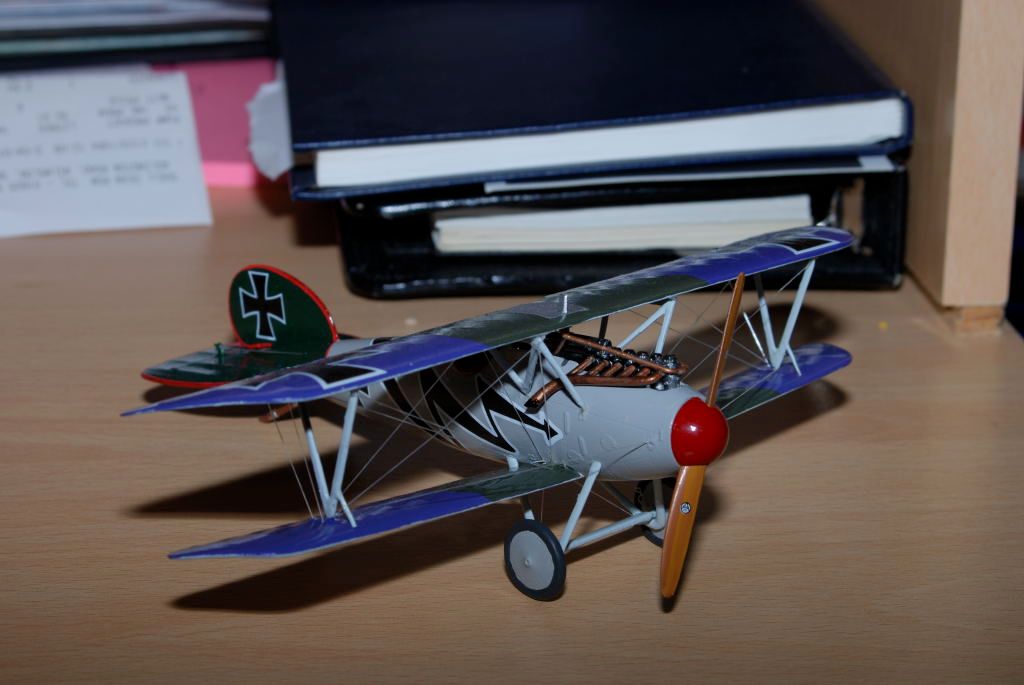
Very nice indeed 🙂
By: paul178 - 26th June 2012 at 13:14
They look very nice indeed Arthur!:)
By: Arthur Pewtey - 26th June 2012 at 09:11
I’ve used Lycra thread, small holes and superglue – variable results but can look OK.
By: DazDaMan - 25th June 2012 at 20:59
I might give that a bash (hopefully not literally! :D)
By: paul178 - 25th June 2012 at 20:01
I use nylon thread, as for rigging I tend to tie it to the struts and then a few turns with a blob of glue to represent turnbuckles. Thats 1/72 mind. Super bodge I know but if you are careful it looks realistic! If anyone knows a better way that does not prevent me from throwing the whole shebang out the window I an listerning!


 Sign In
 June 25, 2012 at 7:15 pm