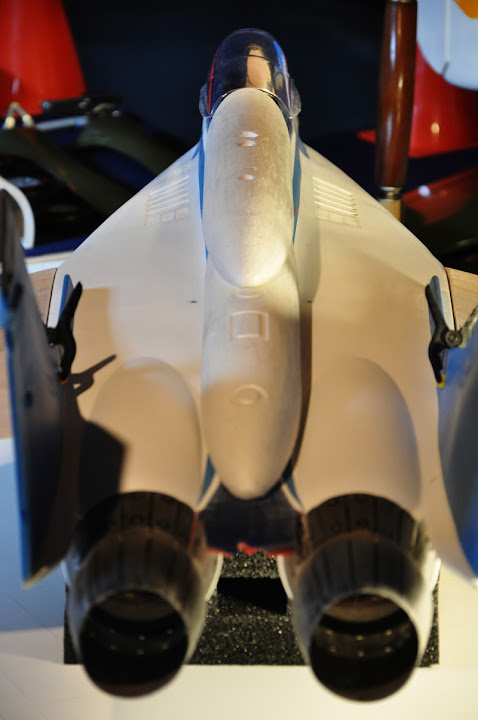
The Scale Built thread location of the Superb MIG 29 Fulcrum.
I’ll be all geared up to start on a scale detail’s journey soon on that fast mover fighter jet …

The role of the MiG-29 is practically the same as the role of previous MiG interceptors: the MiG-21 and 23.
It is supposed to operate under strict control of GCI stations, over friendly territory. It was required to intercept Western bombers and recce planes at different altitudes and in high mach numbers. Thus the Fulcrum has a very good acceleration, climb speed, and maximum velocity, while the range and ECM (which in the first version simply doesn’t exist) suffer.
The Soviet Union has always lagged behind the West when it came to avionics. If the MiG-29 was to be able to counter Western machines, sacrifices had to be made. The radar is limited in range and capabilities: it loses lock easily, has no ride assesment mode, and is voulnerable to beaming. Defence systems (RWR, ECM) are either outdated or nonexistant. The cockpit lacks any „fancy” digital displays and HDDs, and the aircraft isn’t pilot-friendly.

The Fulcrum however has two important aces up its sleeve – the IRST and the HMCS. The IRST (OEPS-29) or Infra Red Search and Track system allows for passive detection and cueing, supports the radar, and can serve as a backup if the radar malfunctions. The HMCS or Helmet Mounted Cueing System is one of the factors that makes the MiG-29 a deadly dogfighter. It can cue R-60 and R-73 missiles onto targets even 45 degrees off boresight, allowing the Russian plane to fire first. However, the capabilities of the IRST and the HMCS, and the R-73 missiles are greatly decreased due to the poor situational awareness assured by the poor avionics and the dependance on support from ground control stations.
MiG-29A ‘Fulcrum-A’ / MiG-29S ‘Fulcrum-C’
http://lomac.strasoftware.com/flyables-mig29.php
The very light GSh-301 packs a good punch, and is highly accurate (with the help of the laser rangefinder fitted into the OEPS-29). Close range R-73 is the first air to air missile fitted with thrust vectoring in operational service. This feature makes it very maneuverable, and able to fire on off-boresight targets. The R-27R medium range SARH missile is a roughly comparable with the US-built AIM-7 Sparrow; with the introduction of the AMRAAM both became completely outdated. An R-27R fitted MiG-29 with its poor radar has a low probability of success in BVR air combat with modern Western jets. Rest assured, the MiG-29 has considerable advantages to its direct competition in the WVR-arena, but also significant disadvantages in the BVR-arena.

Air-to-ground armament is composed of dumb bombs and rockets, and without significant upgrades, the MiG-29 is almost two generations behind ist counterparts.
The Fulcrum is considered easy to fly and very maneuverable: it should have slightly better initial and substained turn rates and be more flexible in maneuver than the F-16A, and on pair with the F-16C. The maximal operating altitude, velocity, and initial climb speed figures are higher when compared to F-16 and F-18, and closer to the F-15.

The only poor performance is range. It is half of that of the F-16. This makes the MiG-29 unable to do any serious offencive sorties beyond the FEBA.
To conclude, the MiG-29 is effective only in the scenario it was built for – GCI controled interceptions over friendly territory or over the front. It was built as a single role Soviet-style plane.
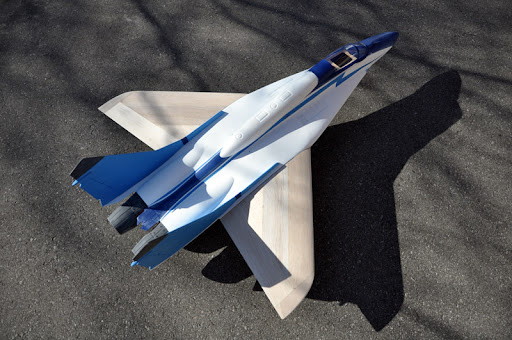
The MIG 29 Fulcrum at his best on a “AOA” air operations area climb.

THE MIG 29 FULCRUM scale project will follow here soon

By: Col.Mitchell - 10th April 2011 at 12:03
Yeah,
I can’t wait also to make up my mind on one … lol …
As I like to design, test, and use my imagination for any
issues, it should come out very stylish and colorful …
Having a great time and fun is what that kept the spirit high.
So it does do the trick for me … 😀
A update,
the dorsal as to done differently after the test been done on the look.
As the canopy glass is kind of small on the side edges it would be to short
to have a tight eachside canopy fit and make it the way i plan have not
pass the final test.
So I decide to use the dorsal extension a different way and over the back
canopy top glass to have a perfect fit. I mite work better that way and will have to make the sand down join flush in betwen the canopy top back glass and the dorsal part. It will work in my book, so more testing are to be schedule
to final that process add-on making …
More to show soon ….
By: Jeff Glasser - 9th April 2011 at 15:43
Can’t wait to see the colour scheme you have in mind
Jeff
By: Col.Mitchell - 9th April 2011 at 11:43
Thanks guy’s !!
I much appreciate your input in here …
I have’nt got to the store to order yet
some other stuff issues came first …
Later soon …
Thanks for the link for the lights system buddy …
Will have a look at them befort maiing my decision …
I have decided to sand down the hole MIG now, and not to keep the nose colors and dorsal RED,, so I can do the paint job my self soon with out going around those old paint area from the kit maker that came already done with the MIG.
I have’nt choose the colors yet, but I have some idea I will take to term soon.
Will have to do the all primer first and then I will be up for the color schemes I would love best for my MIG.
Thanks all for the interest you show towards my MIG build thread making …
Cheers !!
By: Flyer707 - 5th April 2011 at 14:11
Lighting
Col. Mitchell
Love the plane – a great project.
Before you buy your lighting, check out http://www.braincube-aero.com.
They say their lights are very bright, even in daylight, compared to other lighting sets.
By: Jeff Glasser - 4th April 2011 at 14:54
If it did’nt fit, just buy a bigger car:D
Jeff
By: Col.Mitchell - 3rd April 2011 at 11:13
Right on Buddy!
That was a pure pleasure to have found that part to complet
my idea design on that issue with the dorsal. More fitting will come in
the next couple day’s.
Saturday,
did a little work on the dorsal join canopy and test are still at it …
But getting there and very happy of the coming result’s …
As it was a nice cold morning day yesterday,
Got the water out and vacum and got to clean the little Jetta
for her spring clean-up. After the lunch as it was warmer I got
to test if the MIG would fit in the Jetta for transport next to me.

Wonderful news, it fit in there like a glove. Will do soon the hold-down
so it remain tight and staydy while driving to the club.
That is a relief to know it will be a easy going way on the transport with the SMT now … 🙂
More to come on the SMT soon …
By: Jeff Glasser - 2nd April 2011 at 12:03
Yes, there’s a lovely sense of getting something for nothing when you find a part or bit of wood that is exactly what you’re looking for in the spares box.
I keep the plastic lids from aerosols because I’m sure that one of them will fit as a cowling in a later build!:o
Jeff
By: Col.Mitchell - 2nd April 2011 at 11:54
The dorsal,
making is still going strong at the moment.
Was looking around in my old wood junk box I have around
and found from older kit a remain parts that as fit my need
about the joining of the canopy and the dorsal foam part.
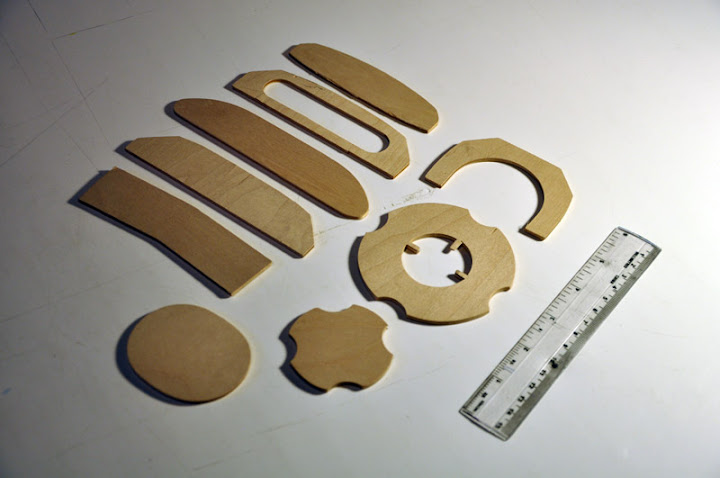
Sometime we find stuff that fit perfectly are expectation on a particular
way a part should be done. That one was already done the way I need it to be with the right cutting at the right place.

So I got this joining canopy foamy dorsal together for a test fit.
Wow, it fit like a glove ball, like if it was made for that in there.

In betwen and behind that round woody part I will add
a kind of black material that is very lite as weigh and strong and
will join in betwen the foam dorsal part and the canopy.
I also gone be using that white & black material that is lite as weigh too
and will re-enforce some specific area in the fuse to keep all fuse weak structure strong and to not have any Vibration in fuse.
Now back to work on the dorsal and in the fuse for re-enforce process …
By: Col.Mitchell - 1st April 2011 at 12:24
Yeah,
thanks to have clarify this issue with me … lol …
Nah, I knew all the time you guy’s were around watching secretly … lol …
Now on the MIG 29 SMT version type class,
Wednesday,
Got the MIG outside the home for a dust cleaning …
Coming along fine on the dorsal making. Will work a little more on that and
some other parts of the MIG till my electronic’s flying system’s get’s here …
Will place a order this week at my hobbyshop for:
HET EDF fan unit 6904 (3.17mm adaptor)
http://www.highendrc.com/index_eproduct_view.php?products_id=20
AR8000 8-Channel DSMX Receiver by Spektrum
http://www.horizonhobby.com/Products/Default.aspx?ProdID=SPMAR8000
Aileron’s servo’s:
82MG Micro Servo by Hitec RCD Inc
http://www.horizonhobby.com/Products/Default.aspx?ProdID=HRC32082S
NAV lights system:
V3 LITE RC Lighting systems
http://www.lazertoyz.com/shop/RCLights.htm
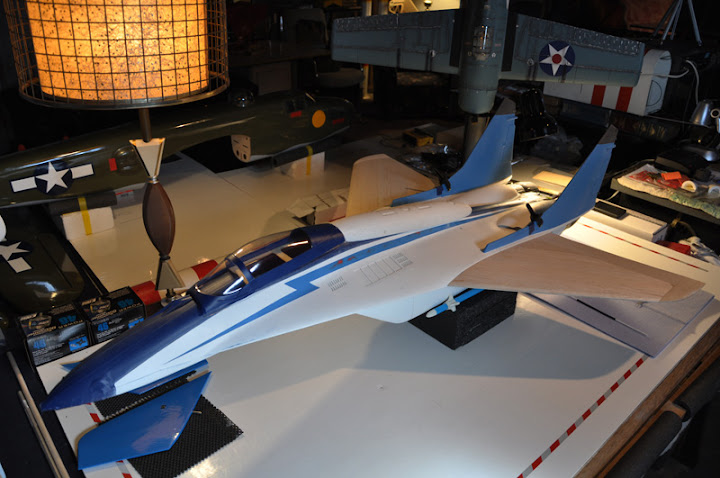
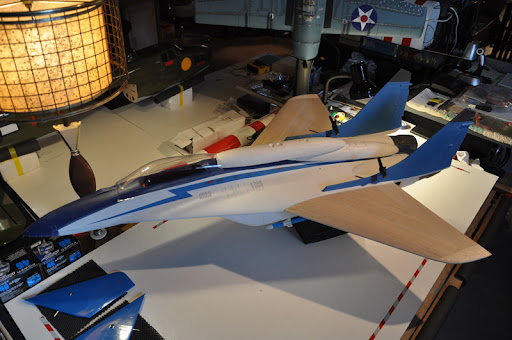
The MIG 29 Fulcrum SMT dusting off ON TARMAC:


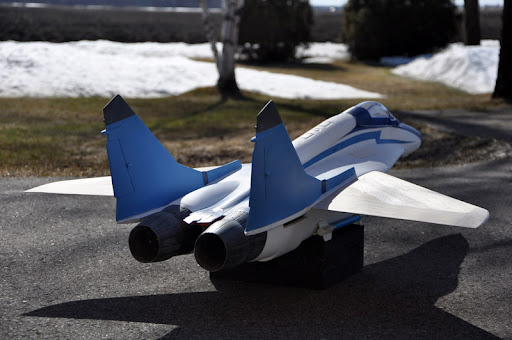
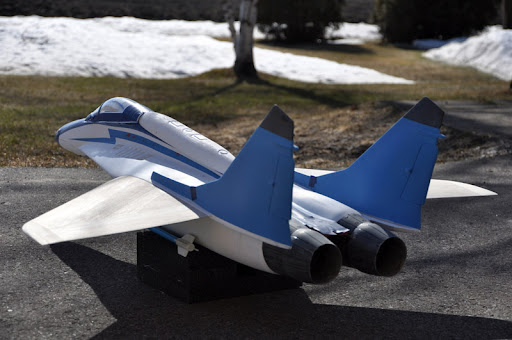

Also,
while I was sanding her down to the bone, did the “Crack test”.
It did crack at a fiew area and no major issues on that test but it
got out some magnets off there location on the fan cover on the tail.
So will re-glue them on and will continue the process making.
I have to make the canopy fit great on the dorsal SMT replica part.
So slow is the key and think ahaead and imagination is use at best.
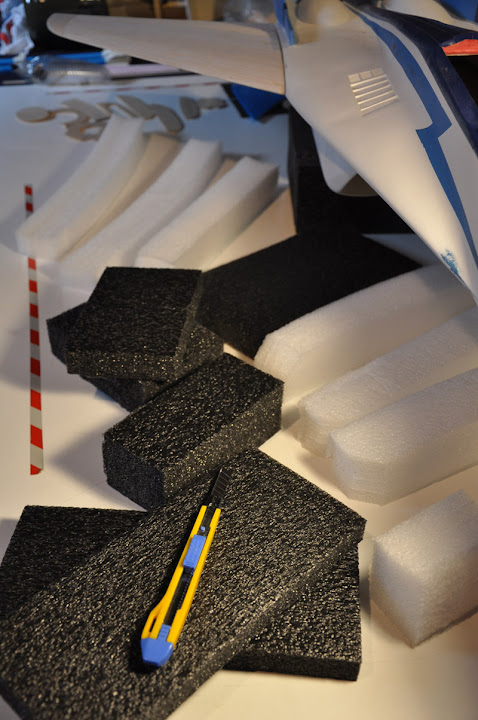
For now, I wont do the RG on the MIG, as it will gain some extra weight.
Will keep it low weight as possible and will be happy if I can get it under
7 lbs. The color schemes are still not confirm as yet, but getting my
ideas together more and more it approach the primer time application …
Thanks for the interest you have shown me here with the MIG 29 Fulcrum SMT class type making …
I feel at home with the UK friends here for shure …
Ladies too yea know ! 😀
By: Jeff Glasser - 29th March 2011 at 15:56
Yes, do’nt worry, we modellers are here watching. Nice stuff in the background too Colonel!
Now you know how nosey we are!!!:rolleyes:
Jeff
By: benyboy - 29th March 2011 at 01:01
Hi
It must seem like you are talking to your self some times 😀 but we are here watching 🙂
Its looking great, keep up the good work 😎
Ben:cool:
By: Col.Mitchell - 28th March 2011 at 11:35
More have,
been done on the dorsal making of the SMT MIG 29 version type class.
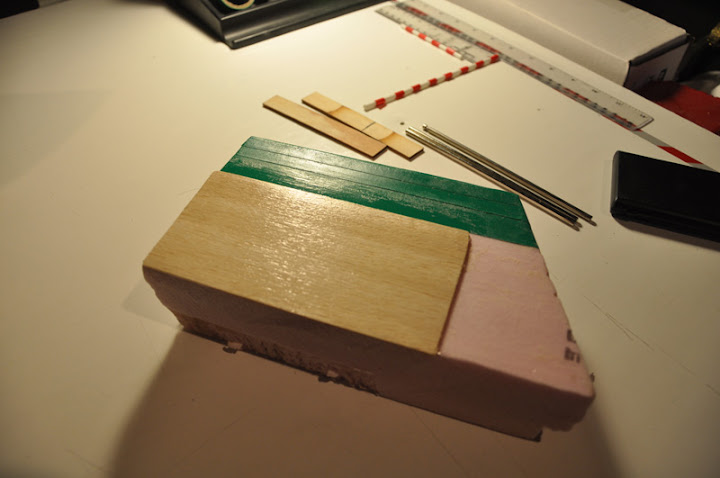
To make a perfect fit of the dorsal unit part, I have laydown a sand paper #80
on the dorsal of the MIG. Then took the foamy dorsal part and did some foward and backward action pass to sanddown the foam to become later as a perfect attach join fit via the top fuse dorsal of the MIG and the foamy part of the dorsal SMT class type.
Till now it as come to a nice align fit. But more sanding and more fitting are to come as to make the canopy fit equaly to the dorsal new part.
I will keep this process simple and will re-produce as close as scale this unit dorsal part. Will gain little weight as the foam is empty inside so that gives me less weight at final acheivment.
I shure love the beefy style it gives the MIG as look now with the SMT dorsal making …
Please till now …
More to come and to show process soon …

By: Col.Mitchell - 26th March 2011 at 10:55
Now,
was yesterday testing the wing covering glassing on a piece
of balsa sheet test part. As mention befort I have made the use
of some hair spray MEGA hold product and made a 2 coats pass then
let it dry 20 min’s in betwen coats.
That action the balsa sheet wont suck in the glassing product use.
Befort the next step I needed to sand down a little the balsa wood sheet.
Next was to apply floor varnish with a small brush on the balsa sheet wood.
Did one pass coat and let it dry 12 hours. Then second coat was apply till dry.
Little was apply and brush it till flush and silk. Don’t over do it at this stage …
Look amazing as glassing goes and finish. This week end will test the first coat
of primer on the balsa sheet wood tester. Will come back with the result soon.
Also I have done a little on the elevator’s and start to look at the dorsal shape
of the SMT version MIG 29 Fulcrum to be done in proper size and shape.

The dorsal of the SMT version making.
Will see how it turn out befort inplant on.
At present,
Testing stage on the MIG 29 Fulcrum SMT dorsal version type style.
Love the beefy look of the dorsal on the SMT …
More modification are to come on that area section of the MIG.


By: Col.Mitchell - 22nd March 2011 at 09:31
After,
taking all off the mono covering over the wings that had air bubbles all over,
I have sand down both side wings till a complet clean and smooth surface.
Now the wings are ready for the next step …
Having aileron’s cutting & inplant & followed by a 2x servo’s build structures underwings location.
Retractable gears holddown wood structure to be build for main and nose gears that will be going into the fuse soon …


Found something to add maybe later at that location inplant …
Will see about that later …

By: Col.Mitchell - 21st March 2011 at 09:38
Yesterday,
got to the wings and to off the covering.

Did some sand down on them bottom and top wings section.
More to come on the wings to do soon …
Next will be to make all my RG wood support that will attach the
retractable mechanical air system.
By: Col.Mitchell - 20th March 2011 at 10:55
Saturday,
again on the sanding process outside at the sun all afternoon.
Finish the third pass on the fuse with sanding lite paper process.
It look very clean, smooth and ready for primer soon.
Then got back ont he vertical rudder fin’s.
Was to sand down with lite sand paper. Finish that at the end of the day
and result looks awesome and ready for primer soon.
Now I have found 2x small Hitec HS81 servo’s that i had from a past kit.
They are brand new from the box and will inplant them in the rudder’s
vertical fin’s interior side to activate rudder fonction soon.
Will look at the wing’s today …
By: Col.Mitchell - 19th March 2011 at 09:22
Yesterday afternoon,
got to sand-down the vertical rudder fin’s.
The ruff sanding as been done and remain to do is
to sand-down with a smoother liter sand paper today to finish them ready.

Was very windy outside yesterday and it help blowing the dust over my part’s
I was sanding down. I Also when over the fuse and sand down with a liter sand paper to finish the fuse sanding …
Been having thought’s about the color scheme design I will do.
At the moment I have some great idea’s and think I found what will be at the paint job menu later.
Time will tell …
By: Col.Mitchell - 15th March 2011 at 10:03
Some up-date …
Been reading alote about this model kit on some build thread.
Some fly it lite and some fly it heavy like 9lbs … Ouff …
Great model for shure if kept very lite. So got on the move in someway
and stripe her down to the bone … Kept the top dorsal red color and front nose black and greay silver nose cone.
Sanding,sanding,sanding as been on my schedule days lately.
MIG 29 on the sanding down to the bone process:


Dusting off a little and more sanding to come …

Will attack today the twin tunel underbelly sanding process …

By: Col.Mitchell - 11th March 2011 at 12:44
The MIG Journey as start !
First I have set some re-enforce with the Automative glue for the EDF hatch door’s. As most of time model made of fiberglass have some dry area that need to be re-freash. Do this if your feel and hear craking sound while handle the fiberglass part’s.
Now they dont crack sound while handle anymore …

You wont be sorry later to do that process …
Next to come is to re-enforce all in there and where it need automative glue to freash it up
and bond well all those fiber that join together ….


It maybe not much fun now to do this, but worth the effort to a lasting flying MIG 29 jet in my collection.
By: Col.Mitchell - 28th February 2011 at 12:31
The MIG 29 Fulcrum
as a special type class I want to re-produce.
As far as today here is the,
MIG 29 Fulcrum SMT class type I am looking for to reproduce in scale soon
and will base my self on the SMT class type detail’s and part’s to make.
I do not have my mind set on the color scheme as yet …
The MIG 29 Fulcrum is on her way to my homebase now.
Should arrive this week if all goes as plan …
The MIG 29 Fulcrum SMT class type:


 Sign In
 February 21, 2011 at 1:33 pm