My thoughts are with you and your Sister. I hope that she pulls through.
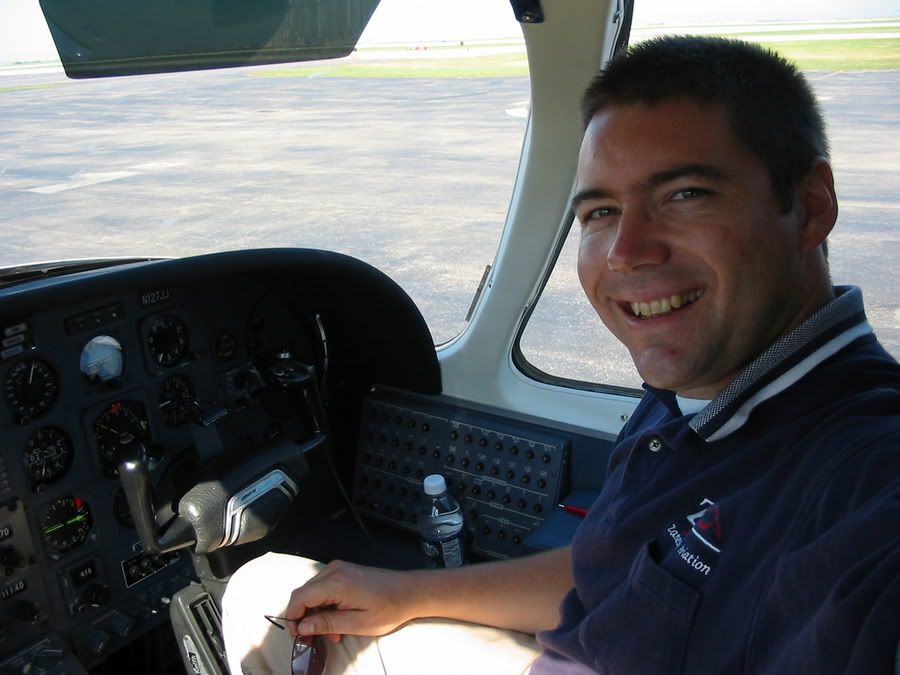
Click on thumbnail for full sized pic.
Taken last September on my first Citation trip.
Click on thumbnail for full sized pic.
Taken last September on my first Citation trip.
Man I’ve been studying this oral exam guide to help prepare me for my checkride, and I don’t think I’ll ever learn all this crap. I hate no knowing what the guy is going to ask me.
I don’t think I’ll ever get my PPL at this rate….
You don’t have to know the oral exam guide word for word.. you do have to have a good understanding of the topics covered in it though. What you learned to pass the written test will obviously help. The main difference is that you can pass the written by memorizing the answers. The oral is designed to ensure that you actually do know and understand the information you need before being cut loose to fly as a private pilot. Also, bear in mind, that knowing all the ‘crap’ that you are studying may just save your life one day (and the lives of your passengers). Safe flying is all about knowledge, experience and attitude. As a freshly minted private pilot you won’t have much in the way of experience, so you must rely even more heavily on learned knowlege and a cautious attitude.
Keep plugging away at it. You will be supprised just how much you already know. A lot of the questions are just common sense. get someone to ask you questions from the book and see how you do. I think you will be pleasantly supprised.
Good luck.
I just stumbled onto this thread. All I can say is a big thank you to those who took the time and trouble to contact the seller and get him to change his mind. I would like to give him the benifit of the doubt and put it down to a momentary lapse of judgement. Needless to say, images of the broken airframe have a lot more meaning to me than just rivets and twisted aluminium. After learning some of the details from the accident report, those images are even more distressing.
Thanks again..
Paul
A truck or minivan would have far greater payload potential than a C150/152. I’ll bet you could get it closer than 3 miles from the White House too. :rolleyes:
One of my favourite pictures of Neil at a Yeovilton air day. He was a big fan of the Swordfish and was in awe of the men who flew her in combat. The photo was sent to my by a friend after the Firefly accident (If you are reading this John, please drop me an email).

I saw the accident from the crowdline. The Invader flew past the crowd right to left, heading south, and as it did so it climbed and rolled left. When the roll reached the inverted position the nose dropped sharply, and the aircraft continued rolling left before it disappeared flying vertically into the valley. There was no sound of an explosion but a large puff of smoke. I understand the Invader was carrying little fuel. I also believe that the onset of stall on this aircraft due to the laminar wing design was sudden and unforgiving.
That sounds sickeningly familiar. 🙁
Most of this has been covered above, but here goes……..
Do your homework. The Oral test is very important. You are making your first impression with the examiner. It will be obvious to him/her if you know your stuff or not. If you don’t know the answer to a question then say so, but make an educated guess. Have all your flight planning ready before you get tothe airport (and that could mean that you had to get up very early to do your planning with the current weather). Do a manual flight log, and then back it up by using an online flight planner such as the one available with DUAT or the AOPA Real Time Flight Planner. Your manual plan should match the figures on the computer generated flight log pretty closely. When I did my Commercial checkride I did the manual flight log and backed it up with two different computer generated logs. The examiner will most probably teach you a thing or two. Look at it as a learning exercise. If you do well in the Oral then you have set the stage for a sucessful checkride.
Although Janie has a good point about flying just before the checkride, I would suggest the day before. That gives you all the time you need on the day to get your flight planning thoroughly prepared (which can be very time consuming if you cover all the bases).
Don’t be supprised if your flying goes to worms on the flight before the checkride.. that is not unusual (and happened to me). Just try to remember that your CFI would not have signed you off for the checkride if he/she did not think you were ready for it.
When you actually get to the flying part of the test, relax and take everything at a relaxed pace. Follow the checklist and don’t feel rushed. You will be supprised at how quickly the flight will go.
If you have a good instructor, you will more than likely be trained to a higher standard than the PTS requires.
Good luck!
Well, personally I think the Captain did the right thing. The incident, however innocent it may have been, was frightening anddistressing to a lot of passengers. I am sorry, but if I was on that plane and someone did that, I would be certainly not feel comfortable in a post 9/11 age. Am I being racist.. no, I don’t think so.
Well, personally I think the Captain did the right thing. The incident, however innocent it may have been, was frightening anddistressing to a lot of passengers. I am sorry, but if I was on that plane and someone did that, I would be certainly not feel comfortable in a post 9/11 age. Am I being racist.. no, I don’t think so.
^In any conflict there will be human error.
^In any conflict there will be human error.
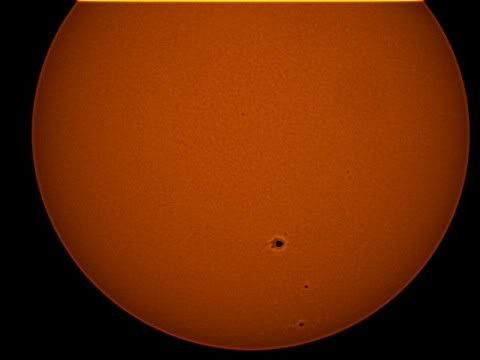
Ok, just show that a small scope can see some amazing things… these were all imaged using the small telescope (Meade ETX70). Click on the thumbnails for the full sized images.
Sunspots (using a Solar Filter – under no circumstances should you point the telescope at the sun without a Solar Filter attached to the objective end).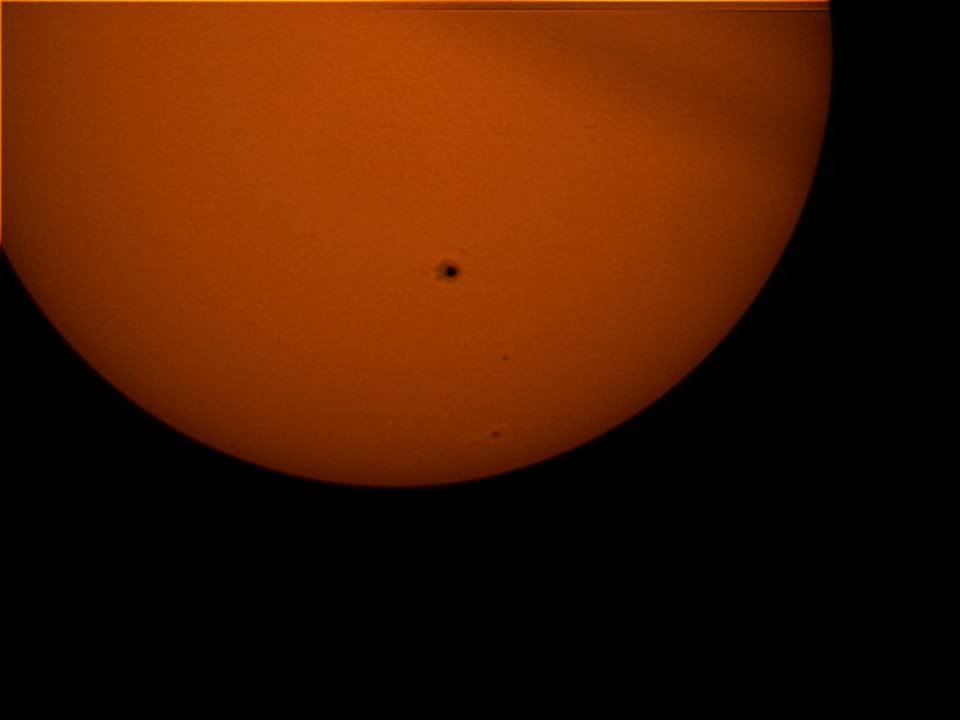
Saturn: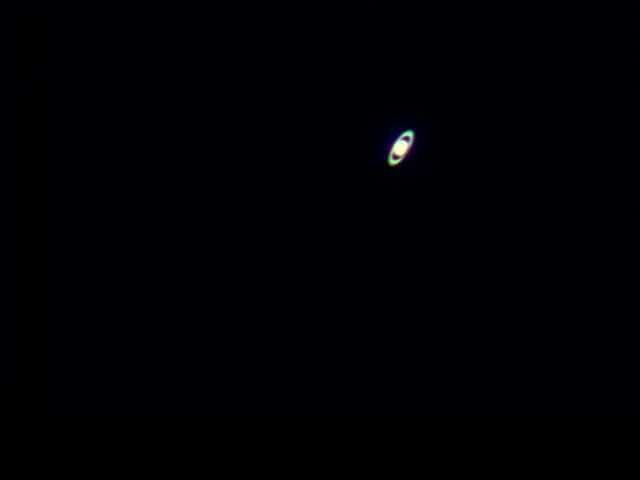
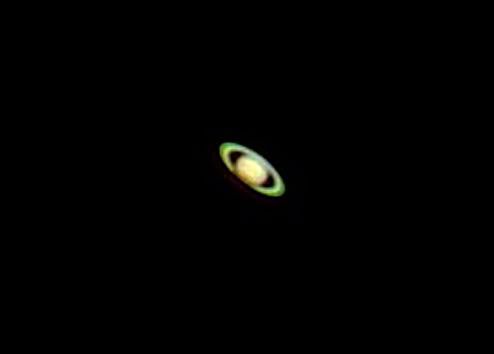
This shows my shots of Saturn as I gained some experience with the telescope and camera settings..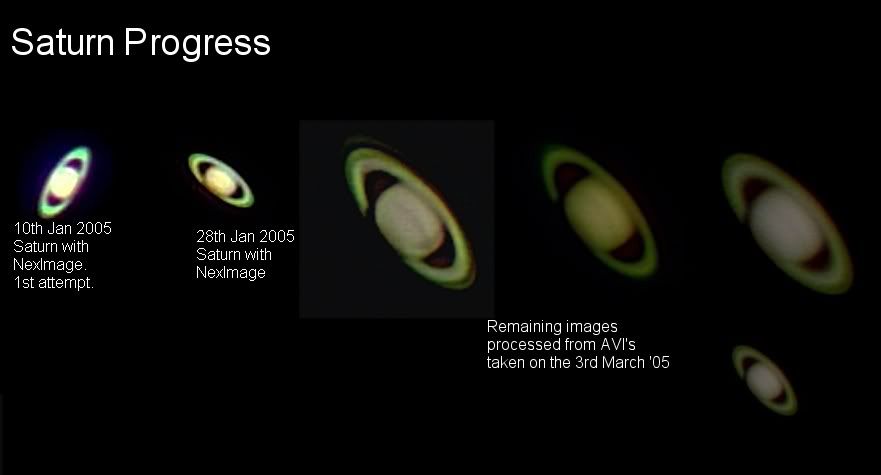
Jupiter:
This is my first ever jupiter image.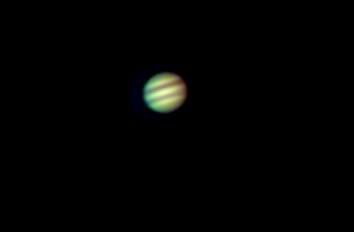
More Jupiter shots as I learned more..
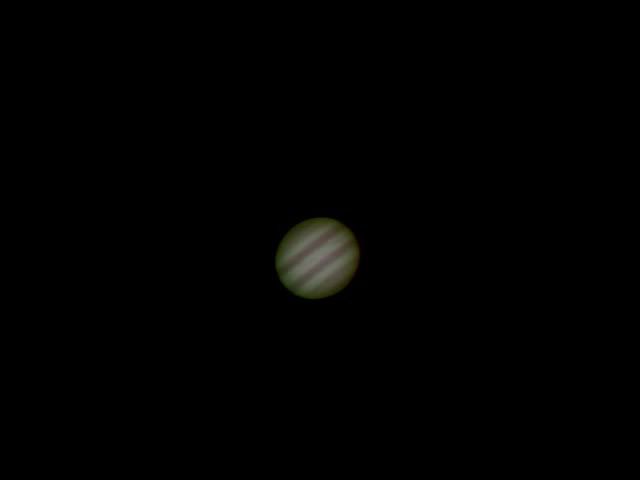
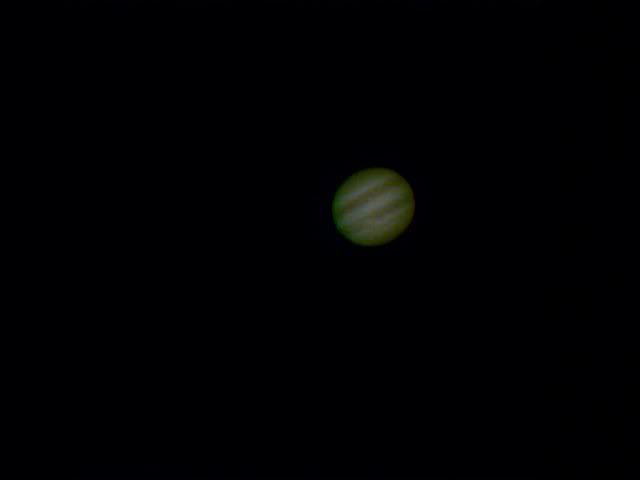
My best ETX70 Jupiter image, showing the Red Spot: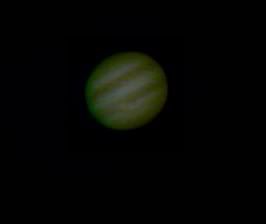
The Great Orion Nebula (M42):
Globular Star Cluster (M53)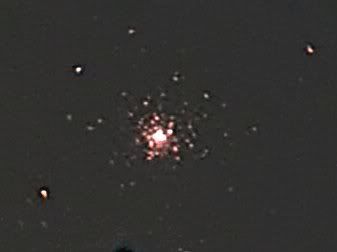
M44 open star cluster.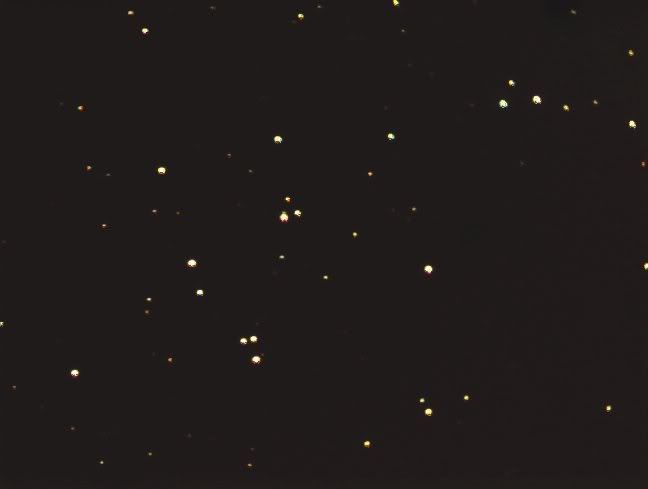
Not quite Hubble standard by any means, but not bad when you consider that the equipment used cost about $300 (telescope, barlow lenses and Camera) excluding the laptop pc for the planet images. The deep space objects used the DSI camera which cost almost as much as the rest of the setup put together ($275).
Please bear in mind that the view through the eyepiece is not as good as the images at the greater magnifications. The images are possible through a process called stacking, where you take hundreds of frames in an AVI file, align them and stack them (basically you average the individual frames).
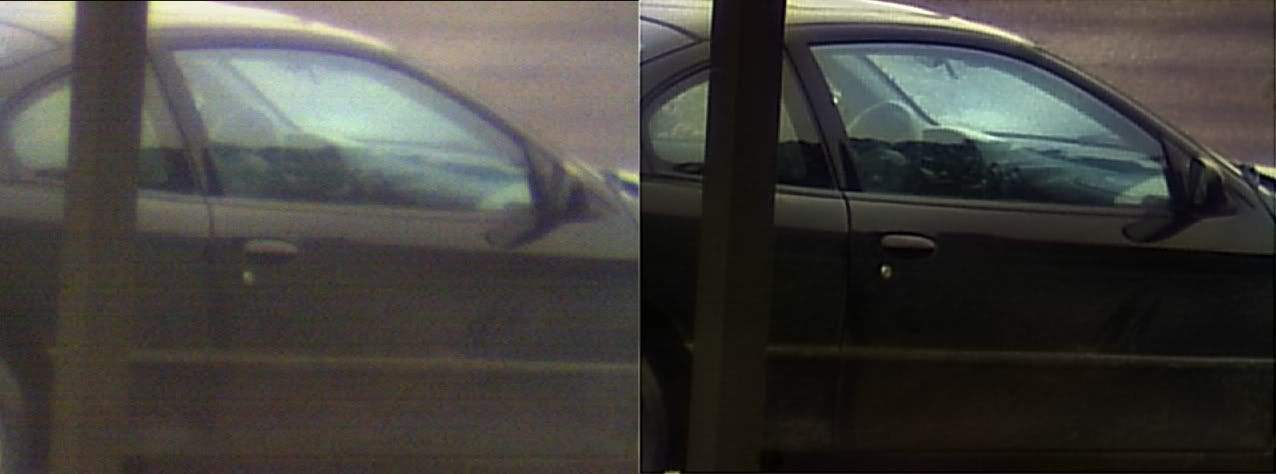
Here is an example. This was a test shot I did when I first got the camera.
The frame on the left shows what you see as the camera captures the avi file. Kind of low quality.. The frame on the right shows the result of aligning and stacking several hundred frames.. the ‘noise’ gets averaged out and you end up with a huge improvement.
Ok, just show that a small scope can see some amazing things… these were all imaged using the small telescope (Meade ETX70). Click on the thumbnails for the full sized images.
Sunspots (using a Solar Filter – under no circumstances should you point the telescope at the sun without a Solar Filter attached to the objective end).
Saturn:
This shows my shots of Saturn as I gained some experience with the telescope and camera settings..
Jupiter:
This is my first ever jupiter image.
More Jupiter shots as I learned more..
My best ETX70 Jupiter image, showing the Red Spot:
The Great Orion Nebula (M42):
Globular Star Cluster (M53)
M44 open star cluster.
Not quite Hubble standard by any means, but not bad when you consider that the equipment used cost about $300 (telescope, barlow lenses and Camera) excluding the laptop pc for the planet images. The deep space objects used the DSI camera which cost almost as much as the rest of the setup put together ($275).
Please bear in mind that the view through the eyepiece is not as good as the images at the greater magnifications. The images are possible through a process called stacking, where you take hundreds of frames in an AVI file, align them and stack them (basically you average the individual frames).
Here is an example. This was a test shot I did when I first got the camera.
The frame on the left shows what you see as the camera captures the avi file. Kind of low quality.. The frame on the right shows the result of aligning and stacking several hundred frames.. the ‘noise’ gets averaged out and you end up with a huge improvement.


 Sign In